Adding/Removing Users from Your Xero Organisation
If you have added your Xero organisation via the Connect/Add Organisation, you are able to administer the access of other users.
Adding a User
To Add a User, click Manage, or select Organisations from the drop-down menu.
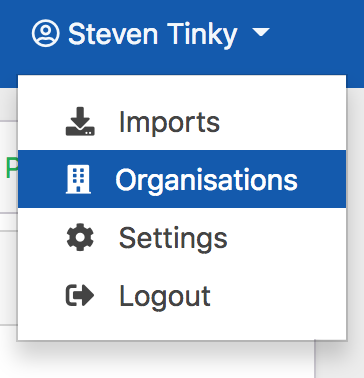
Click Manage on the Organisation you wish to manage.

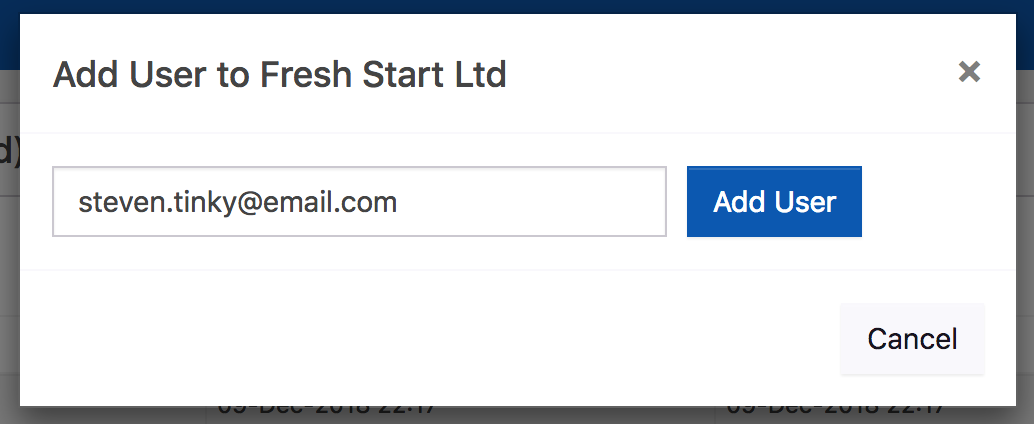
Select Add User, enter an email address and then click Add User.

Restricting User Access
User access can be restricted to specific employees along with the ability to create pay runs and approve timesheets - click here for more details.
Removing a User
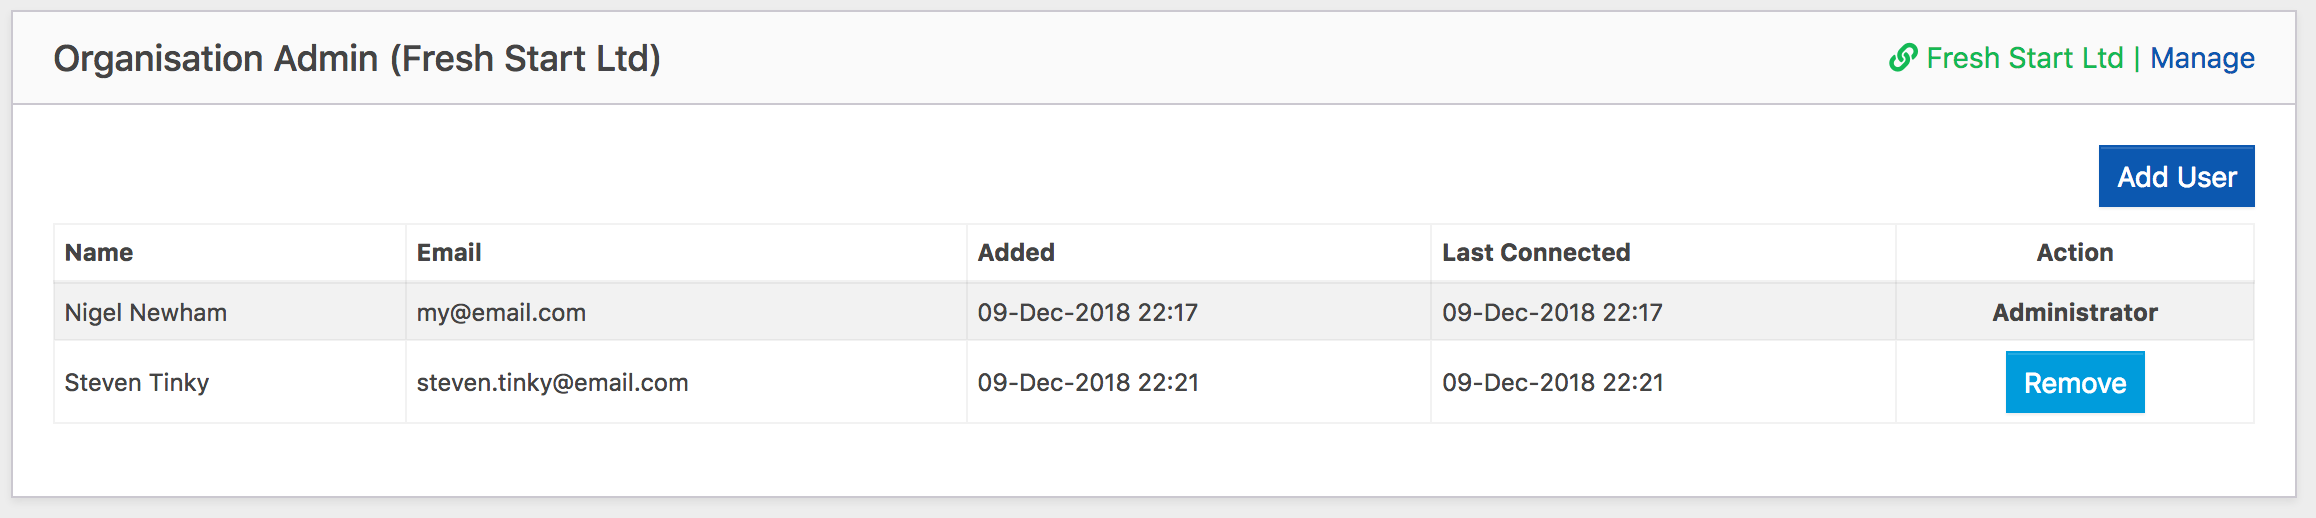
To Remove a user, click the Remove button and click OK to confirm your choice. If you wish to add the user again, you can do so using the above process.